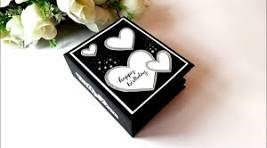
How to Make a Beautiful Handmade Scrapbook for a Birthday
Creating a handmade scrapbook is one of the most personal and heartfelt gifts you can give on a birthday. Not only does it allow you to relive special moments, but it also shows how much effort and love you’ve put into curating memories. Whether you’re making a scrapbook for a friend, family member, or partner, it’s a beautiful way to capture the highlights of your relationship and life experiences. In this blog post, we’ll walk you through some creative ideas and steps to craft the perfect birthday scrapbook.
1. Choose a Theme for Your Scrapbook
The first step is to decide on a theme. This will help you create a cohesive and visually appealing scrapbook. The theme could revolve around:
- Milestones: Capture major events like graduations, travels, or firsts (first vacation together, first pet, etc.).
- Favorites: Highlight favorite moments, places, foods, and shared experiences.
- Journey Together: Showcase how your relationship or friendship has evolved over the years.
- Hobbies & Interests: Tailor the scrapbook to the birthday person’s hobbies like photography, sports, music, or cooking.
2. Select Photos and Memorabilia
Gather photos that represent special moments and memories you’ve shared with the birthday person. These could include:
- Childhood photos (if applicable)
- Event pictures (birthdays, holidays, trips)
- Random candid shots
- Memorabilia like concert tickets, travel postcards, or love notes
Including both posed photos and casual, in-the-moment pictures can add variety and emotional depth to your scrapbook.
3. Plan Your Layout
Before you start sticking things down, plan how you want the pages to look. You can sketch your ideas or use apps like Canva to create digital layouts beforehand. Here are some layout ideas:
- Chronological Timeline: Organize the scrapbook as a timeline, showcasing memories from oldest to most recent.
- Collage Pages: Group several related photos on a page with overlapping edges to create a fun, busy effect.
- One Event Per Page: Dedicate a page to each important event, such as a birthday, vacation, or celebration.
4. Choose a Color Scheme
Pick a color scheme that complements your theme and photos. You can match the colors to the birthday person’s favorites or choose hues that reflect the vibe of the scrapbook (e.g., bright and cheerful for a fun birthday or pastel tones for a more elegant look).
5. Add Creative Embellishments
Embellishments bring your scrapbook to life. Here are some creative additions you can use:
- Stickers: Add birthday-themed or hobby-related stickers for extra flair.
- Washi Tape: Use colorful washi tape to frame photos, decorate corners, or create borders around the page.
- Confetti and Glitter: Sprinkling a little bit of confetti or glitter on your scrapbook can add a celebratory touch.
- Pressed Flowers: For a delicate and natural aesthetic, include pressed flowers or leaves.
6. Incorporate Handwritten Notes
Adding handwritten notes gives the scrapbook a more personal feel. Write short captions or longer letters to express your thoughts, feelings, and well wishes. Here are some ideas for what to include:
- Photo Captions: Describe the moment or memory behind each photo.
- Birthday Messages: Write heartfelt birthday wishes, reflecting on your relationship and shared experiences.
- Quotes and Song Lyrics: Include quotes or lyrics that resonate with your relationship or the birthday person’s personality.
7. Use Creative Fonts and Typography
Mixing fonts and typography styles can make your scrapbook more visually dynamic. You can write in different styles or use alphabet stamps, stencils, or printed font cutouts to highlight:
- Titles or page headings
- Important dates
- Special messages or quotes
8. Include Interactive Elements
Make your scrapbook more fun and interactive by adding elements that the birthday person can touch, move, or open:
- Envelopes: Include mini envelopes with small notes, gift cards, or tickets inside.
- Fold-out Flaps: Use paper flaps or pop-ups to create surprise photos or hidden messages.
- Mini Pockets: Create little pockets where you can slip in extra photos, wishes, or mementos.
9. Decorate the Cover
The cover of your scrapbook sets the tone for what’s inside, so make it special. You can:
- Use the Birthday Person’s Name: Write or cut out their name with bold lettering.
- Add Decorative Elements: Stickers, ribbons, and drawings can make the cover stand out.
- Personalized Message: Include a message like “Happy Birthday [Name]” or “Memories of Us.”
10. Put It All Together
Once you have everything planned, it’s time to assemble your scrapbook:
- Lay out all your photos, embellishments, and notes in the planned order.
- Attach everything using adhesive, such as glue, double-sided tape, or adhesive dots.
- Make sure to leave space between items to avoid clutter.
Final Touches
Once your scrapbook is complete, give it a final look-over. Double-check that everything is securely attached and that the pages turn smoothly. Adding a special note or signature on the last page is a lovely way to end the scrapbook, wishing the birthday person another year filled with love and memories.
Conclusion
A handmade birthday scrapbook is an incredible gift because it’s personal, thoughtful, and a keepsake the recipient will treasure for years. By combining creative layouts, heartfelt messages, and interactive elements, you can craft a scrapbook that beautifully celebrates your time together. So, gather your photos, papers, and embellishments, and start designing a birthday scrapbook filled with memories and love!

